
Connect Stripe to Seline for revenue analytics
Track your Stripe revenue alongside your website analytics. See MRR trends, attribute payments to traffic sources, and view customer payment history on visitor profiles.
Connect your Stripe account to:
- Get a revenue chart at your dashboard.
- See which referrers and UTMs bring you the most revenue - revenue attribution.
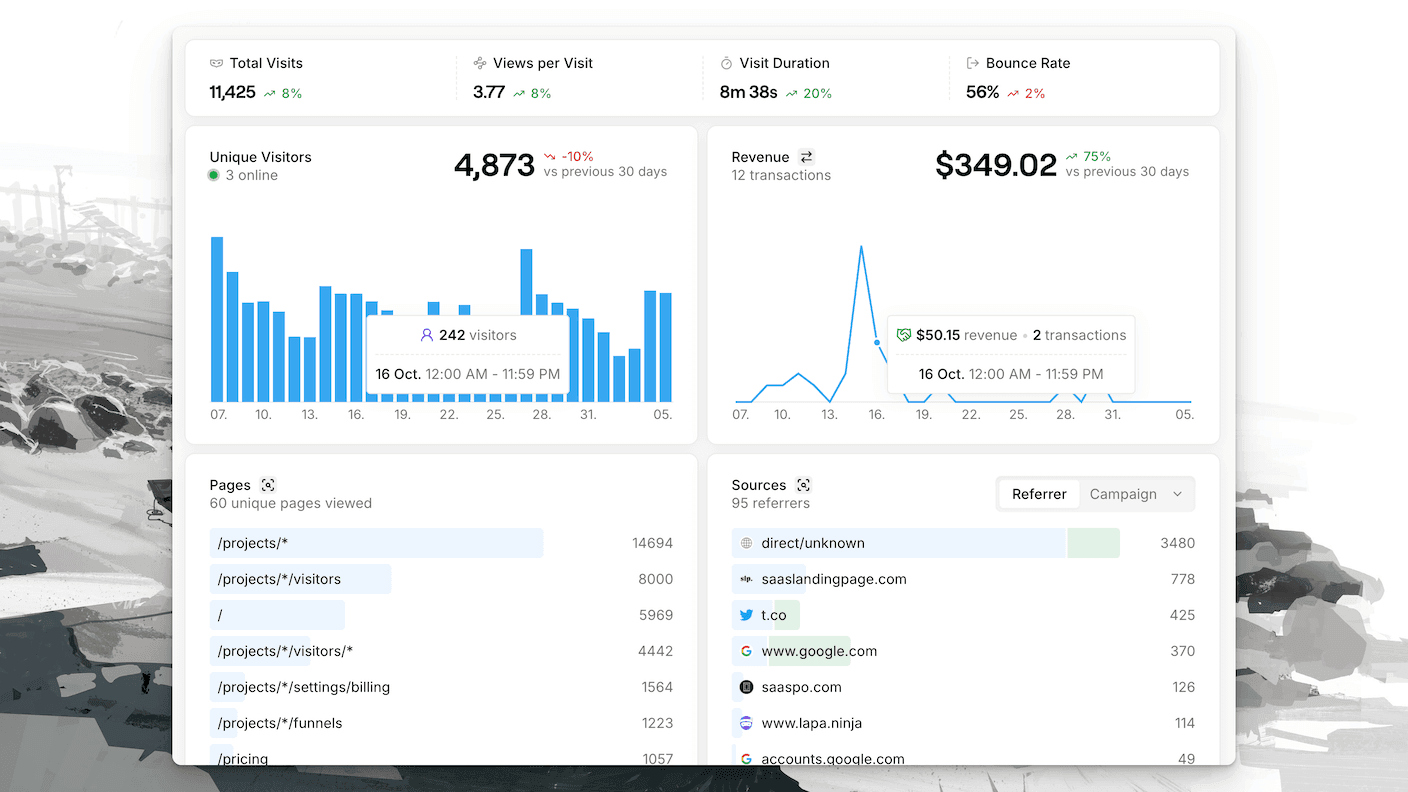
- If you use profiles, visitors with email property will get their subscriptions and payments pulled and displayed at their profiles.
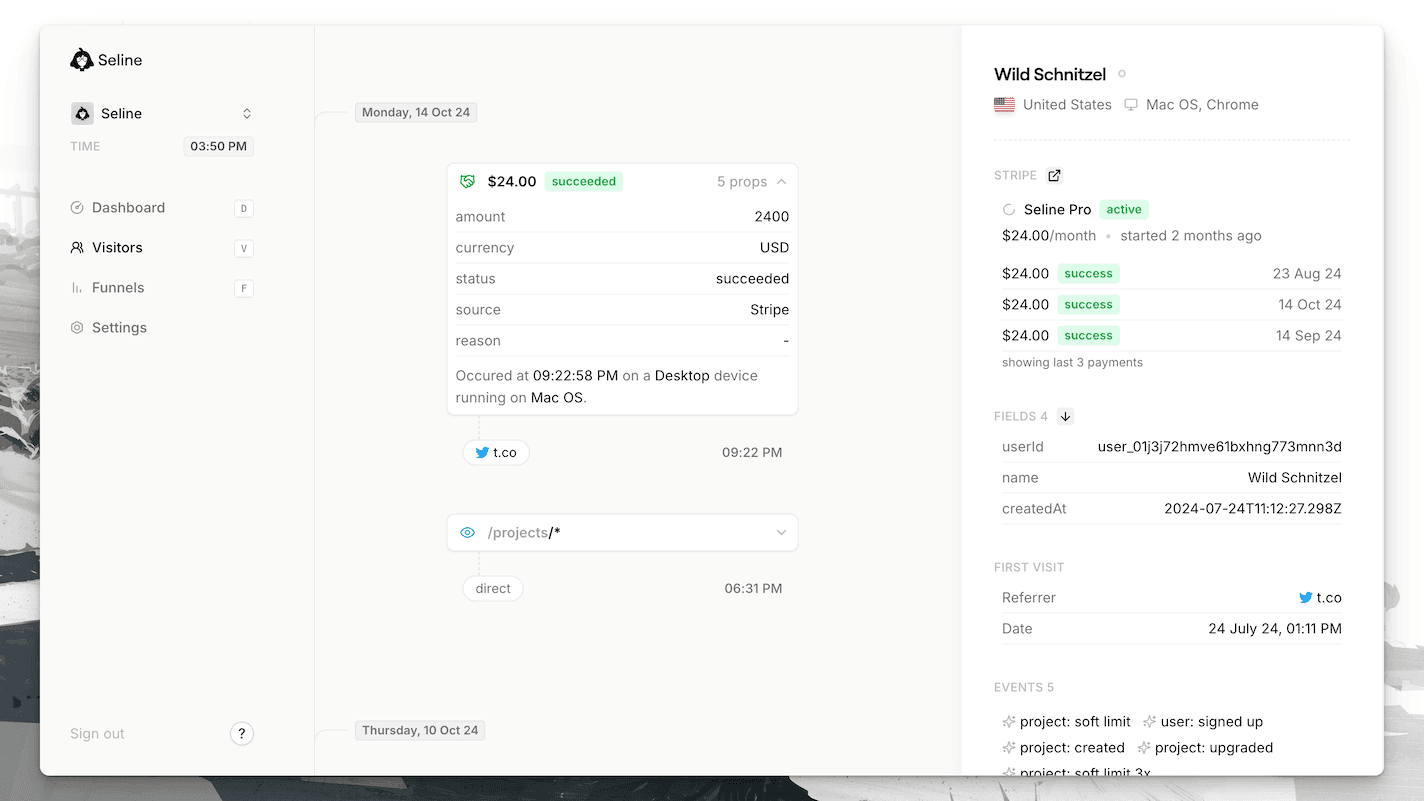
Revenue attribution
Seline can match a Stripe charge to a visitor in two separate ways. Use either, or both.
The revenue chart is displayed as soon as Stripe is connected. Revenue attribution (referrers, UTMs, visitor journeys) needs us to match a charge to a visitor — see the two methods below.
1. Email via setUser()
For signed-in users. Call seline.setUser() with an email that matches the Stripe customer email. We then attach that customer's charges to their profile.
This is the method to use if you already identify users in your product.
2. Visitor ID via Checkout metadata
For guests and anyone who never signed in. Call seline.getVisitorId() and pass it as seline_visitor_id when you create a Stripe Checkout Session.
const visitorId = seline.getVisitorId();const session = await stripe.checkout.sessions.create({mode: 'payment',line_items: [/* ... */],success_url: 'https://example.com/success',metadata: {seline_visitor_id: visitorId,},});
If you create Checkout Sessions on the server, you might need to enable cookie mode and read the seline_vid cookie.
This works for one-time payments and subscriptions. Recurring charges stay attributed to the original visitor.
How to connect Stripe
Step 1: Create a read-only Stripe API key
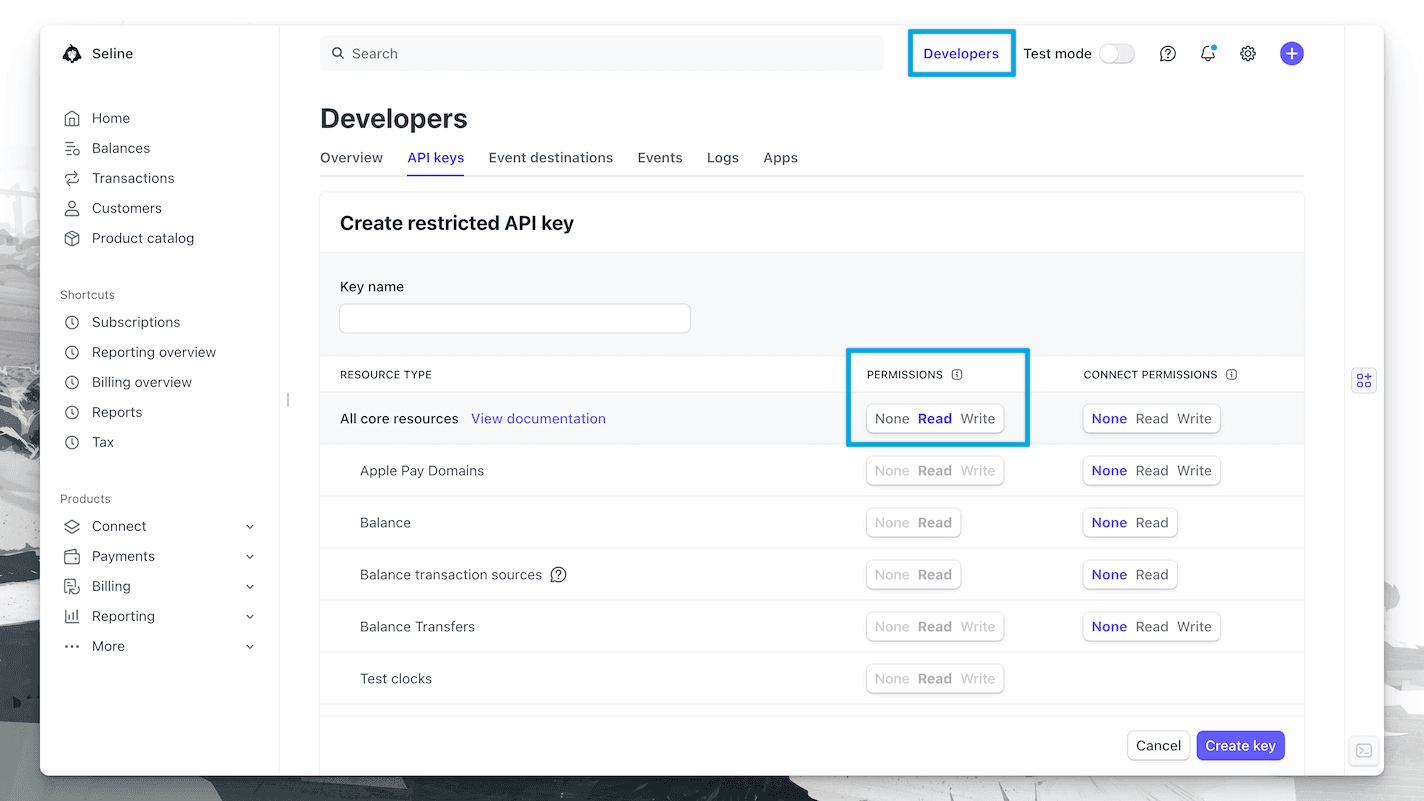
- Go to your Stripe dashboard.
- Set all the permissions to Read and create the key. You can set Read to just the All core resources and All Billing resources, because that's what we currently use, but setting Read to everything will ensure we have permissions for our future features.
Step 2: Add the API key to Seline
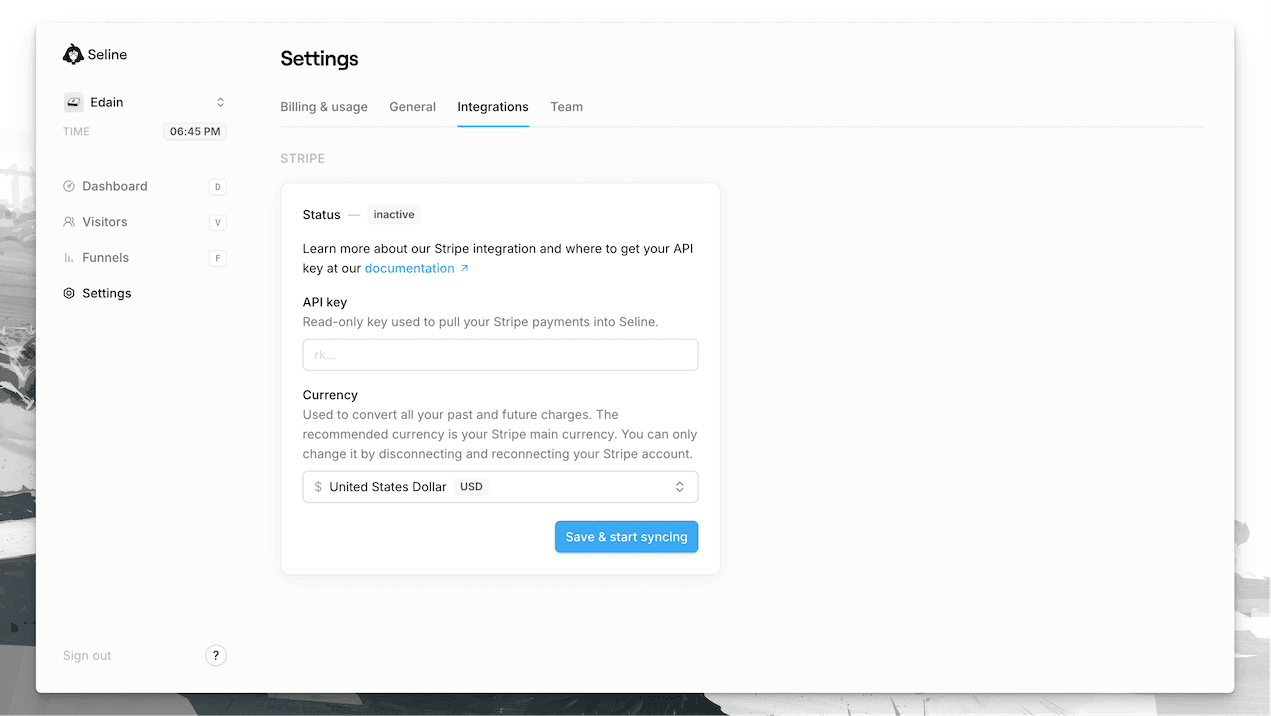
- Go to your Seline Settings → Integrations page.
- Paste your Stripe API key into the input field
- Select a single currency you want all charges converted to. This setting is mainly for multi-currency accounts. If you use a single currency in Stripe, we recommend selecting it.
That's it. Wait a couple minutes, and you'll see your revenue data synced with Seline.
Developers
Only having an API key, we can't listen to webhooks. Instead, we attempt to pull the data from Stripe every minute.
- We pull all Charges since the last successful pull and save them as events.
- We match charges to visitors by email (setUser()) or by seline_visitor_id Checkout metadata.
- When opening a visitor profile that has an email, we try to send a request to Stripe API to find a Customer with that email and pull their last 3 subscriptions and last 3 payments. This is later displayed on the right side at their profile. We don't save this data, but pull it every time you open a profile.